tags:
Contents
VirtualBox
VirtualBox is an open source virtualization product that allows you to run VMs on your desktop for free. It works extremely well and allows you to run almost every modern operating system.
Unfortunately, it isn’t quite as polished as other products such as VMware Workstation. To make a virtual disk larger we need to power off our VM and go to the command line.
Prerequisites
We will need VBoxManage to extend our disk. This program is installed when you install VirtualBox.
I will be using Windows to do this operations, but it works the same using Linux.
VBoxManage
By default, you will find VBoxManage in the C:\Program Files\Oracle\VirtualBox directory. I am working in that directory running the commands below. Be sure to change into that directory before you begin.
cd "C:\Program Files\Oracle\VirtualBox"
Identify The Disk to Extend
Before we can extend our disk we must identify which disk we’d like to extend. To list all VirtualBox disks you can use this command:
.\VBoxManage.exe list hdds
Example:
C:\Program Files\Oracle\VirtualBox
λ  .\VBoxManage.exe list hdds
UUID:           4bb97324-299b-4dd8-84cc-cdb10b40b249
Parent UUID:    base
State:          created
Type:           normal (base)
Location:       C:\Users\luke_000\VirtualBox VMs\Ubuntu\Ubuntu.vdi
Storage format: VDI
Capacity:       12288 MBytes
Encryption:     disabled

UUID:           194c7162-4ada-44a4-9e7d-41448e4807f2
Parent UUID:    base
State:          locked write
Type:           normal (base)
Location:       C:\Users\luke_000\VirtualBox VMs\centos7\centos7.vdi
Storage format: VDI
Capacity:       13312 MBytes
Encryption:     disabled
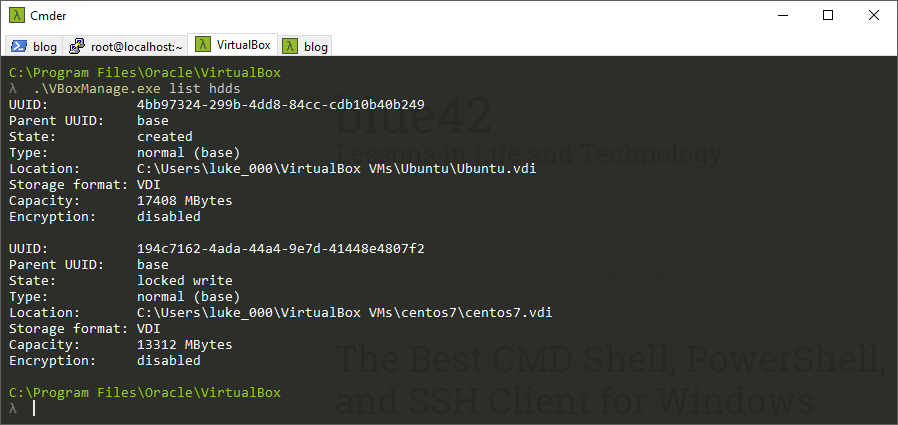
You can see above that I have two VirtualBox disks on my system. VirtualBox disk file names end with a vdi file extension. They are refered to as hdds (hard disk drives) when using the VBoxManage command.
VBoxManage Usage
To resize our disk we will use the modifymedium option. Here is a breakdown of the usage:
λ  .\VBoxManage.exe modifymedium disk
Oracle VM VirtualBox Command Line Management Interface Version 5.1.30
(C) 2005-2017 Oracle Corporation
All rights reserved.

Usage:

VBoxManage modifymedium     [disk|dvd|floppy] <uuid|filename>
                            [--type normal|writethrough|immutable|shareable|
                                    readonly|multiattach]
                            [--autoreset on|off]
                            [--property <name=[value]>]
                            [--compact]
                            [--resize <megabytes>|--resizebyte <bytes>]
                            [--move <path>]
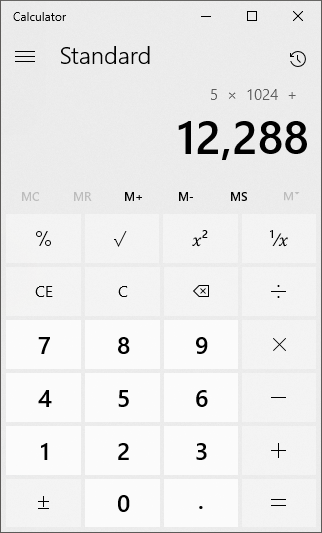
I want to modify my ubuntu disk listed above. We’ll need to know the total new size of the disk in megabytes. To find this information lets assume we want to increase the disk size by 5GB. Multiply 5 by 1024 to get the number of megabytes to add to the existing disk size. In our example, 5 x 1024 = 5120. Our existing disk is 12288 megabytes. Our new total size will be 17408 (17GB).

We also need the full path to the virtual disk image. If there are any spaces in the you must use enclose it in quotes. I recommend always using quotes when specifying a file path.
Resizing
Now that we have the two required pieces of information we can resize our disk. Here is the command:
C:\Program Files\Oracle\VirtualBox
λ  .\VBoxManage.exe modifymedium disk "C:\Users\luke_000\VirtualBox VMs\Ubuntu\Ubuntu.vdi" --resize 17408
0%...10%...20%...30%...40%...50%...60%...70%...80%...90%...100%
Now we can list the hdds again to see the new size of our ubuntu virtual disk.
C:\Program Files\Oracle\VirtualBox
λ  .\VBoxManage.exe list hdds
UUID:           4bb97324-299b-4dd8-84cc-cdb10b40b249
Parent UUID:    base
State:          created
Type:           normal (base)
Location:       C:\Users\luke_000\VirtualBox VMs\Ubuntu\Ubuntu.vdi
Storage format: VDI
Capacity:       17408 MBytes
Encryption:     disabled

UUID:           194c7162-4ada-44a4-9e7d-41448e4807f2
Parent UUID:    base
State:          locked write
Type:           normal (base)
Location:       C:\Users\luke_000\VirtualBox VMs\centos7\centos7.vdi
Storage format: VDI
Capacity:       13312 MBytes
Encryption:     disabled
As you can see above the new size of our disk is 17408 megabytes.
Conclusion
Now that you’ve done this you will need to make the additional space usable within your operating system. If you are using Windows you can do this via the Disk Management tool. If you are using Linux you can use GParted or extend the disk from the command line.

PS. If you’re curious why my command prompt looks different check out my post about the best windows command shell.